

 C - To get into Quick Mask mode press (Q), or click the icon on the tools pallet below and to the right of the set background/foreground color icon. While in Quick Mask mode the selection is represented by a color. You can set this color by double-clicking the Quick Mask icon. Quick Mask mode gives you greater control for creating complex selections. To exit Quick Mask mode press (Q) again or click the icon to the left of the Quick Mask icon. When you exit Quick Mask mode a marquee will represent your selection. Remember you can save your selections by going to the Select menu and clicking Save Selection... Then, to easily access your selection go to the "Channels" pallet and CTRL-Click your saved selection.
I Realy liked this! The way you explained it. so simple to follow. your a good teacher. I will try the quick mask thing, i have never used it before. In fact, i haven't tried a lot of things you do. I hope this will be up awhile so i can use it as a ref. At first I din't like the human eyes, but as I read on a nd looked closer, it realy is a cool idea! Making them purple was a great idea too! :)
~Tiger~
Tigress
by Leonardo
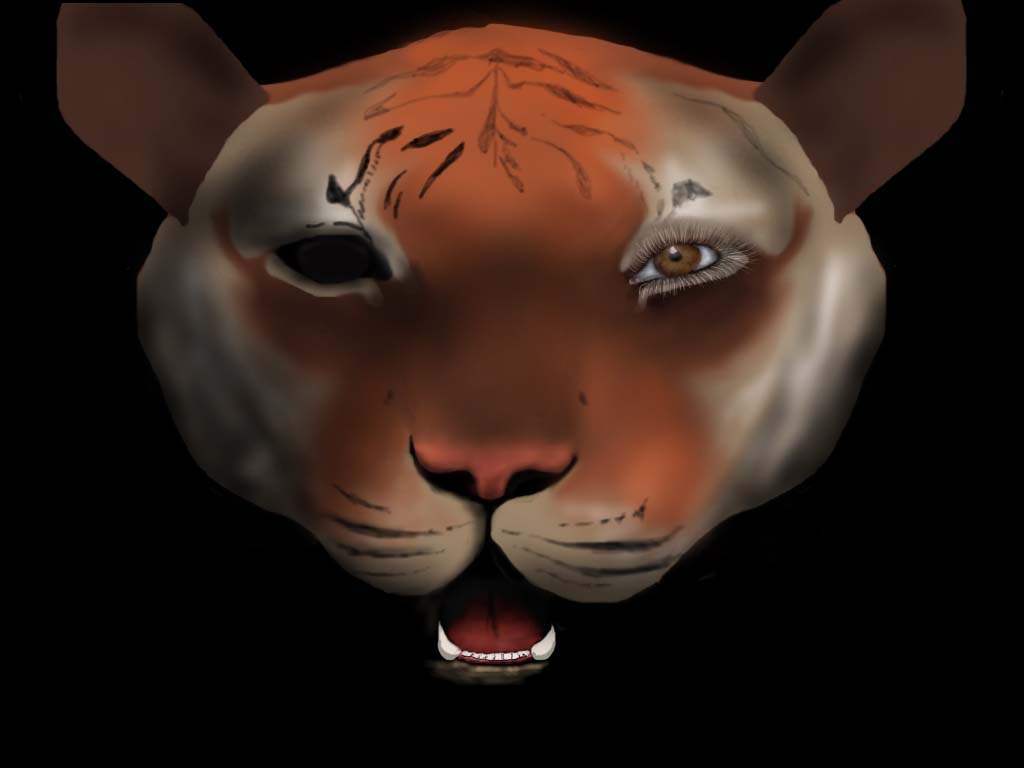
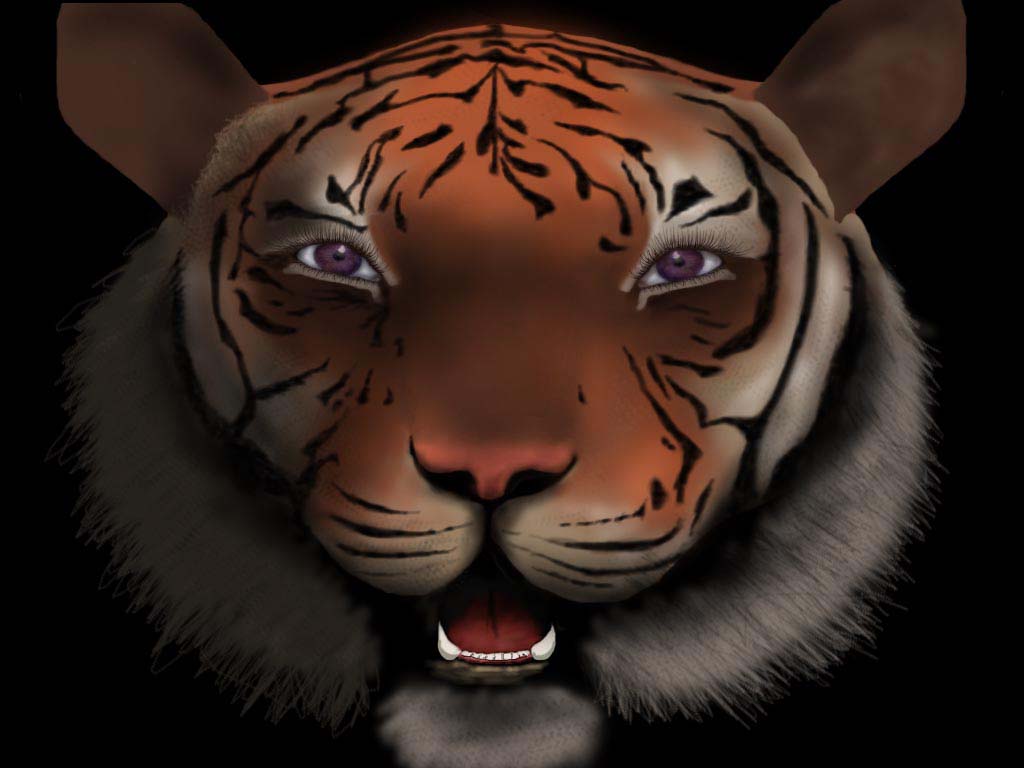
The first thing I do when starting a new drawing is a little brainstorming. A lot of times I'll already have an idea in my head for the finished piece before I even start. I also like to do some research on the elements I'm going to be putting into my drawing. For this one I searched the web, books and magazines for tiger pictures. I then get a pencil and paper and start sketching some ideas, when my sketches start to look like something I'm happy with I'll scan it and put it into a background layer on my drawing. The next thing I did was draw the basic shape of the tiger using the paintbrush. I used a couple of solid colors just to get things laid out and get the proportion right. I then blended and shaded the colors together a little bit.
Once you get the basic shaping finished you can start drawing more detailed elements. I like to start with the eye (on a new layer). I decided to make the tiger have human eyes. This early in the drawing I don't get too detailed. After I had one basic eye finished I copied the layer, flipped it and used it for the other eye. I then started drawing other basic stuff like the nose and mouth.
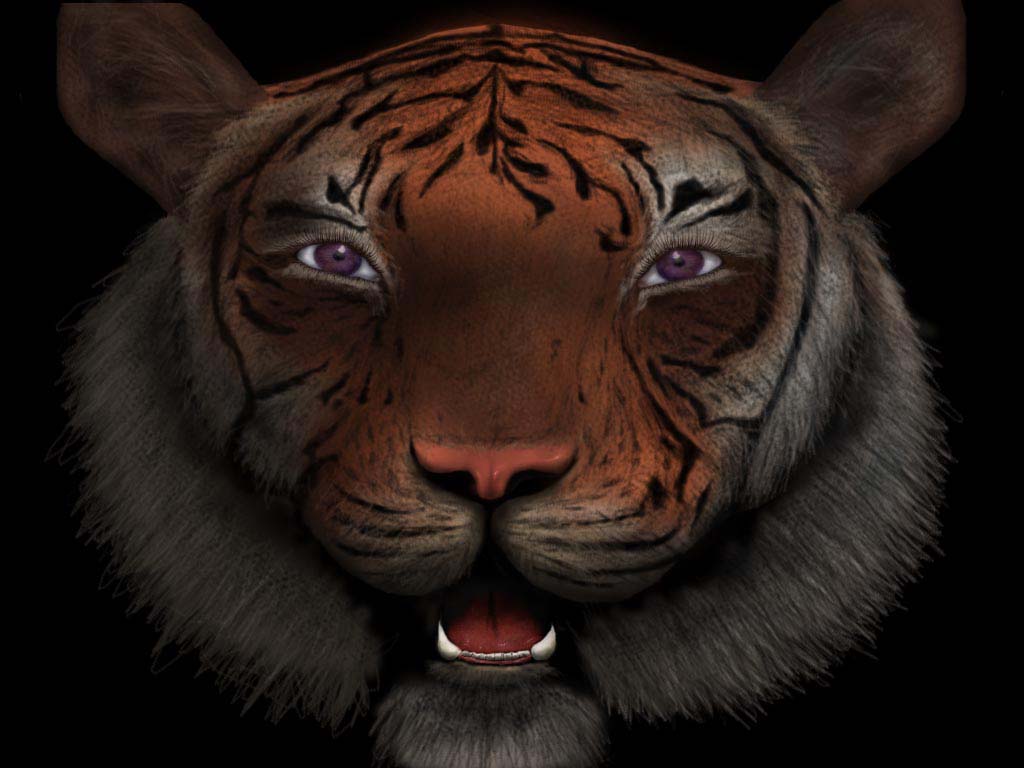
Next I continued to refine the drawing. I made the eyes cleaner and the stripes more defined. After that I added some texture. I did this by creating a custom brush of a few soft dots staggered at different sizes (see Up Close: A and B on the right). I defined the brush and set the spacing at 100. This is something you'll have to experiment with in your own drawing, try various custom brushes at various spacing to get the effect you want. I used several custom brushes for the texture on the fur and hair.
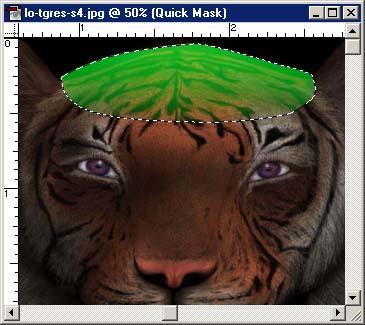
To add more realism I wanted to blur the top of the head to look like it was going out of focus-making the rest of the image seem closer. I did this by first drawing a path around the area that I wanted blurred. Then I went into quick mask mode and made a selection with the path I made. After that I used the gradient tool inside the selection (in quick mask mode the selection is represented by color). I deselected and used the blur tool to blur some of the edges of the selection a little bit. Then I exited quick mask mode and I used the gaussian blur tool. This gave me a gradual blur where the top of the head was most blurred. (See Up Close: C on the right). I also added in the body if the tiger. I blurred it heavily as it was also to appear out of focus.
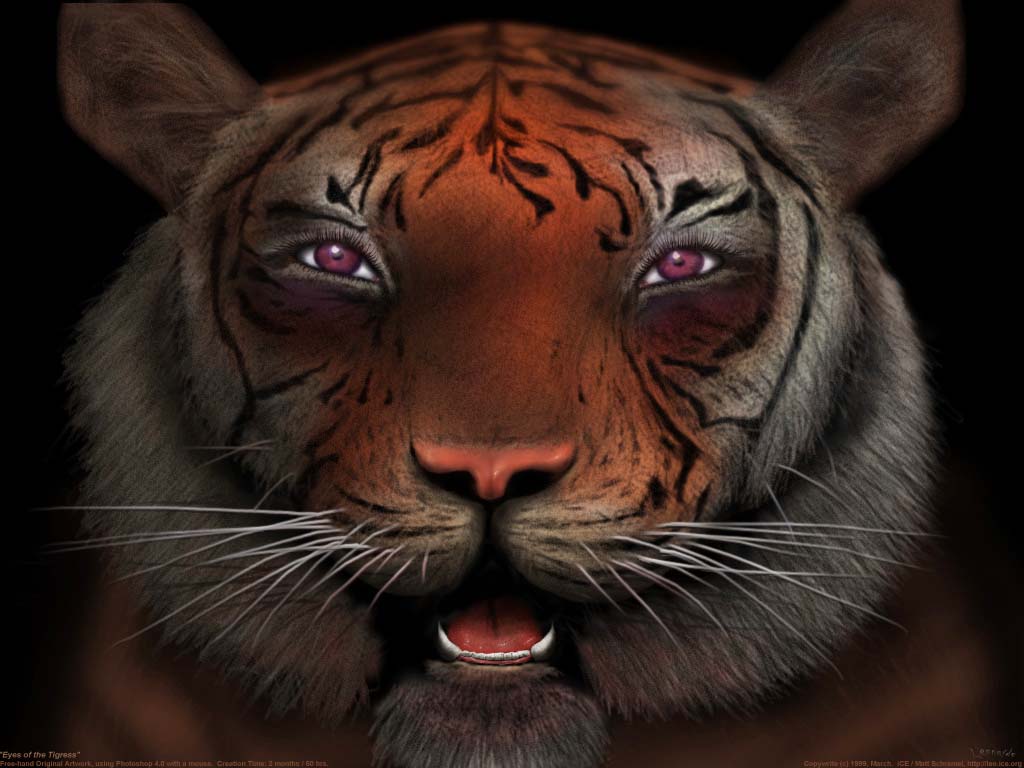
Finally I added some final details to the whole drawing. I drew the whiskers by setting a brush to fade at various steps. Then I copied the whiskers layer, colored it black, set it to be 40 percent transparent and placed it under the whiskers layer to create shadows. As I was putting the finishing touches on I realized the drawing seemed a little dull. I wanted the eyes to be the primary focus and they looked the most dull, I used a bright pinkish color and set the airbrush to overlay to make the eyes stand out a bit more and made the whites in the eyes whiter. I also added some red around the mouth so there would appear to be subtle bloodstains. I still wanted to make the whole image a little more vibrant so I used the curves tool (CTRL-M) and made some slight adjustments to the overall color. |
UpClose
|
I hope you enjoyed this tutorial and maybe even found it useful! Feel free to email me for questions, comments, etc.
Jump to Another Tutorial
Darth Maul by TonchyZ
Portrait by Mongi
Sky and Eyes by Gecko
Maya Tutorial One by DJ MonkeyBoy
How to make really awesome graphics by Greater Evil
Tigress by Leonardo
Happy Tree by Leonardo
Tiles.ice.org by Root88
Digital Inking and Coloring by TonchyZ
Maya Connections by Jamie McCarter
Wet Fruit by DeadGuido
Basic Vectors by DJ Monkeyboy
How to take super cool photographs! by Quantum-X
Landscape by Leonardo
Posts
thanks
Re: thanks
Thank you for the comment!! :) One thing I think is powerful about photoshop is how well you can make selections. The quickmask is great because you actually paint your selections, allowing a lot of flexibility. The pen tool is also very powerful for precise selections and gives you a lot of control for making outlines of objects. Another selection tool I use a lot is "select by color range", which is really useful for grabbing a particular color and/or all colors that are similar. I often use all 3 of these selection tools together to get the selection I want. In addition, the marquee tools, magnetic lasso and magic wand are great for making quick and dirty selections.
Re: Re: thanks
I realy have to learn these othere selection chioces. sounds like I'd get a much cleaner selection and have less work to do.
TIGER
TIGER
uhm?
why did you make the eyes human? it ruined the entire effect! tigers dont have eyelashes
Re: uhm?
and what can it hunt with such small teeth?
Re: uhm?
I believe that is the effect he was going for, jekyll. If you will note the title of the piece, "Tigress"
The tiger is, in fact, part woman and part tiger. As for the teeth, I would agree that they are too small, or too.. something. I'm not entirely sure. I would have to get some reference. I think he may have done that on purpose, though.
The tiger is, in fact, part woman and part tiger. As for the teeth, I would agree that they are too small, or too.. something. I'm not entirely sure. I would have to get some reference. I think he may have done that on purpose, though.
Re: Re: uhm?
i think its a fantasy tigress.... kind of narnia-ish.../(hate to say it)those little notebooks for girls... :-P
real perty though
real perty though
excellent...
tutorial! i really like how you obtained the texture of a tigers face so accurately. sum of those tips, im sure will help me in the future. the eyes look good, and jeckyl: i think tigers, like dogs/cats/humans actaully DO have eyelashes to keep foreign objects out of there eyes. the teeth are small but i think they fit well in the painting. overall great help, and good pic, thanx!